|
After many years of building 1/48 scale models and refining my skills through
experience, as well as tips from fellow modelers and publications, I decided I
wanted to "stretch my legs," so to speak, on my favorite fixed-wing
aircraft in 1/32 scale, the F-4 Phantom. It was a toss up between the Tamiya F-4
C/D and the Revell F-4 E kits. The Revell "long-nosed rhino" won the
coin toss, and production began immediately.
First off, this is an excellent kit of the F-4, a far cry from Revell's older
offerings of the F-4 in this scale. As I do with most of my models, I began work
in the cockpit. The cockpit is finely done by Revell, but there is plenty of
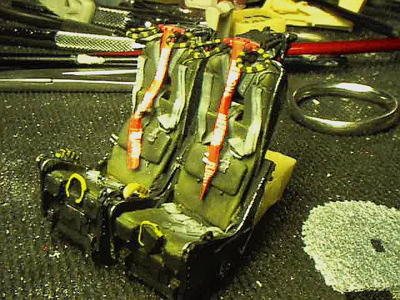
room for added detail. I opted to replace the kit's seats with a pair of Cutting
Edge resin seats.
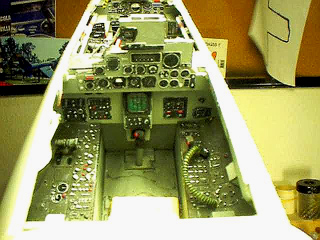
I added some scratch-built details to the cockpit, the circuit breaker panel
in the rear cockpit, for example.
I also scratch-built canopy actuators, breaker panels, cockpit lights, a
landing gear toggle switch, a magnetic compass on the windscreen, plus numerous
lines and suction hoses, and oxygen hosing made from guitar string.
After completing the cockpit, I moved on to the assembly of the fuselage
sections. The fuselage construction was very straightforward and went together
very well.
I then began building on the wings, and again, the construction was very
straightforward and they went together with no hiccups. As with most
McDonnell-Douglas fixed-wing aircraft, when not in operation, the ailerons
droop. I decided to cut, shape, and reposition the ailerons. While doing this, I
decided I would go a little further and also cut and reposition the flaps. Be
aware, however, that this is quite a bit of work - a lot of scratch-building is
needed to complete this modification, as the trailing edge of the wing and
leading edge of the ailerons and flaps must be reconstructed with plastic-card.
I then mated the wing assembly to the fuselage. This requires a little bit of
finesse, but I didn't encounter any major difficulties here.
Next, I added the landing gear, gear doors, outer wing panels, and then
masked off the plane to begin the painting process.
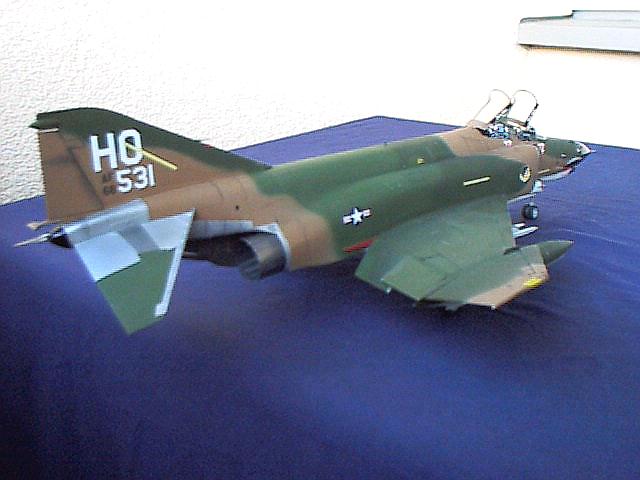
Although the kit decals for the St. Louis or the NJ Air Guard are excellent,
especially for "kit" decals, I really wanted to do a SE Asian Viet Nam
era aircraft. I had some Eagle Strike Production decals for a Viet Nam F-4
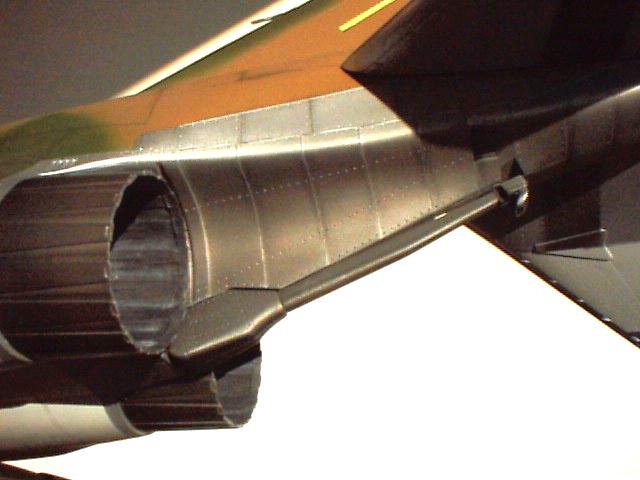
"Mig Killer" flown by Steve Ritchie. After painting the camoflage and
light grey under belly, I masked off and painted the exhaust section using
Testors Metallizer in Titanium Burnt Metal.
When satisfied with my paint job, I gave the whole ship a couple of coats of
Future floor wax, and added the decals. When the decals were dry, I added
another coat of Future. Once this was dry, I added 2 coats of Testors Flat
Clear, then started some mild weathering (my favorite part of modeling) with
some thin black paint and black and grey pastel chalks.
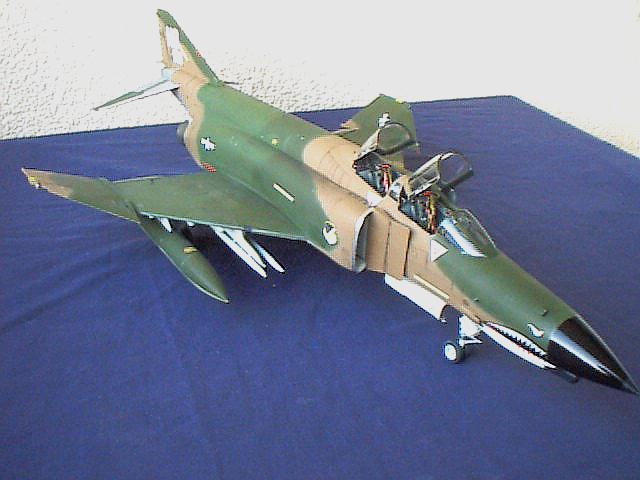
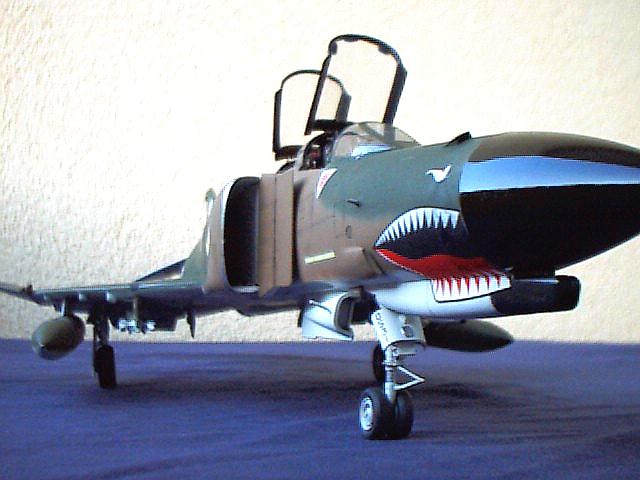
For the finishing touch, I painted the nose ray dome with Testors Gloss Black
and attached it to the model, thus completing the project, and wow...what an
awesome-looking model! I was very happy with the way it turned out. The way this
model looks when completed is impressive both in size and detail, and I highly
recommend it.
I would like to continue to build in this scale, but because I am currently
stationed overseas with the military, I have limited space for a lot of models
this large...but I just had to do a big "rhino"!
Rich
(click on
the image below to load the full size photo)
(use your
back button to return to this page after viewing full size photo)
|