|
The 1/32 Tamiya Zero is without a doubt the most
detailed kit out of the box that I have ever encountered. When the
advertisers said that it took the engineering team at Tamiya three years to
design this masterpiece I have no doubt that it did. My Zero represents a
typical A6M5 assigned to the 261st NAG on Saipan in 1944. Whether or not
this aircraft was destroyed in the Mariana’s Turkey Shoot or not, I do not
know. I do know that several were captured intact and resemble the paint
scheme that I’ve duplicated here. The decals are mostly from Eagle
Strike Productions but a couple are from the Tamiya decal sheet. The
yellow ID bands, the stenciled data plate on the aft, left, lower fuselage along
with the lower wing Hinomaru’s (the meatballs) are from the Tamiya sheet.
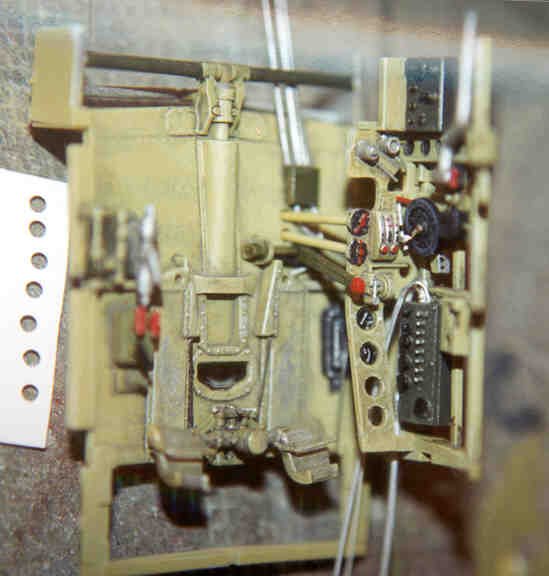
| Construction started with the cockpit, which I detailed with
fine solder, stretched sprue, pieces of plastic card and a few odds and
ends. The whole of the cockpit interior was painted in Nakajima
interior green as this Zero was manufactured by that firm. The other
choice would have been Mitsubishi interior green, which is darker and
resembles interior green, but a bit darker. Behind the cockpit
is the radio and rack, oxygen cylinders, CO2 bottles, the hydraulic
reservoir and some assorted structural ribs and longerons. To detail the hydraulic reservoir, I added a
Modelkasten wingnut on the top to represent the fill port and a spare
radio placard from a Waldron foil set to represent the servicing
instructions and other data. |
|
|
|
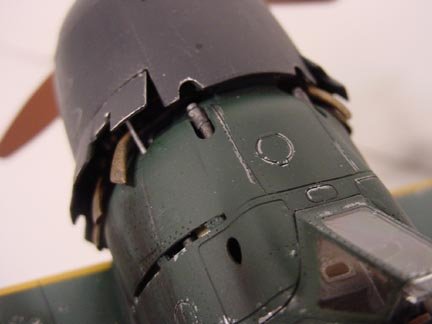
Detailing the cockpit, aft
fuselage and engine soaked up most of the time it took to complete this
project. Under the cowl there are individual spark plugs and ignition wires as well as cooling
baffles, which were made from scratch. I detailed the accessory
drive section (correct terminology for the back of the engine) but
didn’t know at the time that it would not be visible with the side
panels glued in place. I thought about leaving the side panels off
and was almost ready to do it when I decided that it would detract from
the overall look of the zero with the whole front end opened up. I
have another one and I may do it with that one. |
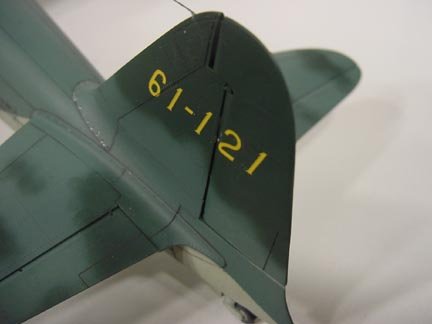
The rest of
the kit was assembled per the instruction manual (and I do mean manual as it’s
at least twenty pages thick) and all seams were filled with squadron white
putty, which I find is a little finer than the green stuff, and/or superglue.
Lost panel and rivet detail was rescribed and the canopies masked for painting.
The underside was given a coat of Nakajima Navy Grey and the topside was given
first a faded coating of Nakajima Navy Green followed by a spotted coating of
fresh Nakajima Navy Green. I gloss coated the model with Floquil
crystal-clear and applied the decals using Solvaset on the Eagle Strike decals
and Super Sol (aka Microsol) on the Tamiya decals. I used the Tamiya
underside Hinomaru’s because they are a bit darker than the Eagle Strike ones
and I wanted the upper wing and fuselage Hinomaru’s to look faded. After
all the decals were dry, I gently washed the model to remove any dried on decal
solvent and set the model aside to dry for a few days. Lastly, I gave the
model a coat of Testors Dullcote and penciled in the panel lines. A final
coat of Dullcote sealed the darkened panel lines and gave it a flat finish.
| I slightly weathered the aircraft using acrylic paints for
grease and oil stains and pastels for exhaust and gun muzzle stains.
Silver pencil and paint were used to represent wear and chipped paint.
All in all it was a great experience and it is an excellent kit. No
problems with assembly whatsoever and although there are some very small
and fragile parts, it’s nothing that any modeler with a few kits under
his belt and some tweezers can’t tackle. I highly recommend this
kit to anyone who’d like to build a big zero. I hope you enjoy looking at the pictures as much as I enjoyed
building the kit.
Tim
|
|
|
|