INTRODUCTION
When
I started this plane I could not imagine that more than one year had to pass
before I could see it finished. Neither realized I was to learn so much from
building it this is my third kit in “adult age modelling”!); unfortunately,
learning derived mainly from a full collection of mistakes I made, some of which
have not been fully recovered. Hope that all the fellow modellers will be
forgiving for this time. I did nothing to point out my mistakes on the photos I
took ;-) On the contrary, I will give full details on these in the article.
THE
KIT
It
is the well known retooled Revell kit; it features finely engraved panels, well
detailed cockpit and gear and markings for two USA ANG planes. I decided to use
no aftermarket parts but only a bit of scratch building to improve some areas.
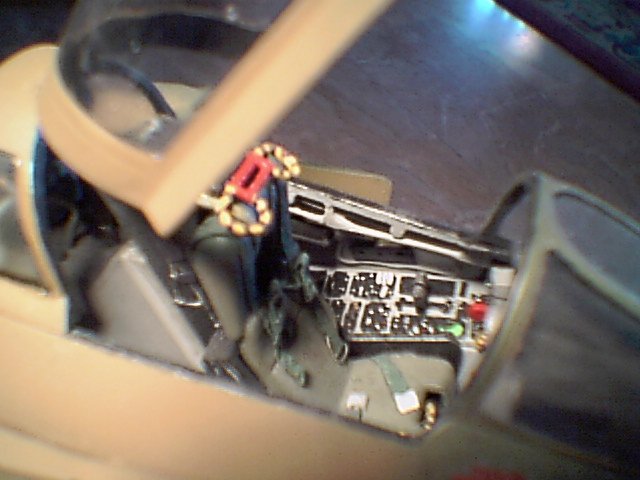
COCKPIT
I
started working in the cockpit, where kit parts were used. I added a few scratch
built items to the seats (not that bad themselves, in my opinion); I removed
molded-on seat belts and added new ones (made by toilet paper dipped into white
glue solution, with buckles made from plastic and steel wire). Side panels were
scratch built with plastic card and sprue shaped with a file (my lack of
complete reference is quite evident in some details that I added with just a
“looks good” guidance. Rear cockpit’s instrument panel was added details
on the back, as well as the rear bulkhead where canopy is hinged. When finished,
I glued the seats in position. MISTAKE #1!!! I had the chance of almost
destroying them in further months of construction!
MAIN
ASSEMBLIES
I
then proceeded as per instructions, building forward fuselage with camera and
front gear bays, then completing the fuselage and wings. Here I made MISTAKE #2!
I was not careful at all in assembling and gluing the main parts; this later
made me spending hours and hours in
puttying, filing, sanding and rescribing. Never again! I also found a nice Tools
‘n’ Tips article here on ARC showing the right way to carry out assembling
and gluing. I also attached clear parts of camera nose and the radome, and make
MISTAKE #3: I got later so much dust on inside of the clear parts, that I could
no longer reach…
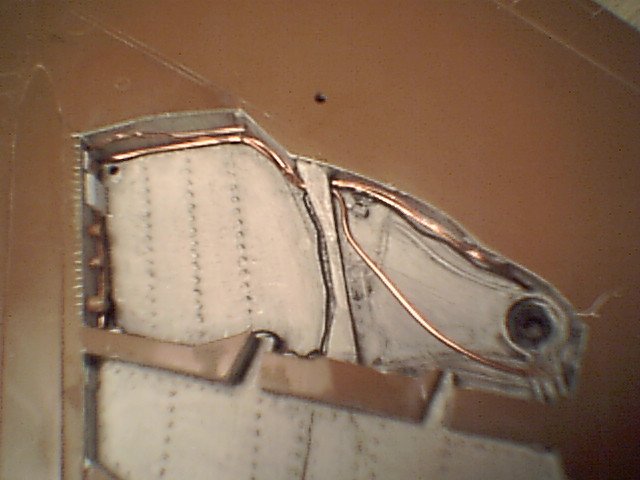
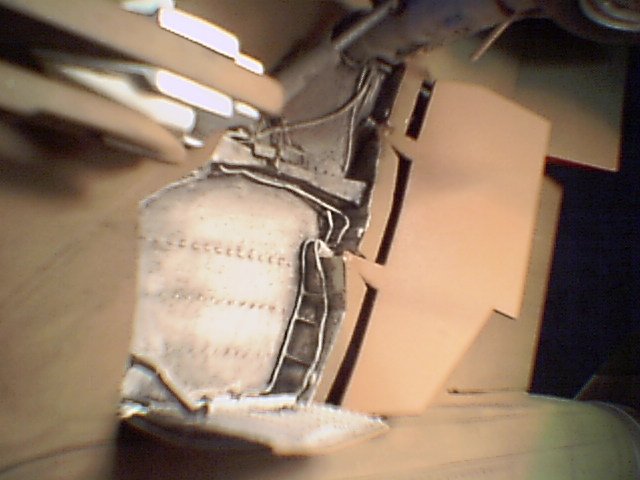
FLAPS
AND AILERONS
|
Click on images below to
see larger images |
 |
 |
I
decided to cut and reposition the flaps and ailerons; this required
reconstruction of leading edge of these. Later, I noticed in my references that
very seldom the flaps are dropped in parked aircrafts; I then reapplied the
flaps in place (an Italian saying is: “fare e disfare č sempre lavorare”
– that translated looses the rhyme and becomes: doing and undoing is anyway
working – for nothing, of course!). Ailerons were glued in a drooped position
in a latter stage, after that painting was carried out; MISTAKE #4! Dry fit I
made of the ailerons was very poor; this can be seen as there is a wide seam at
the wing-aileron junction…
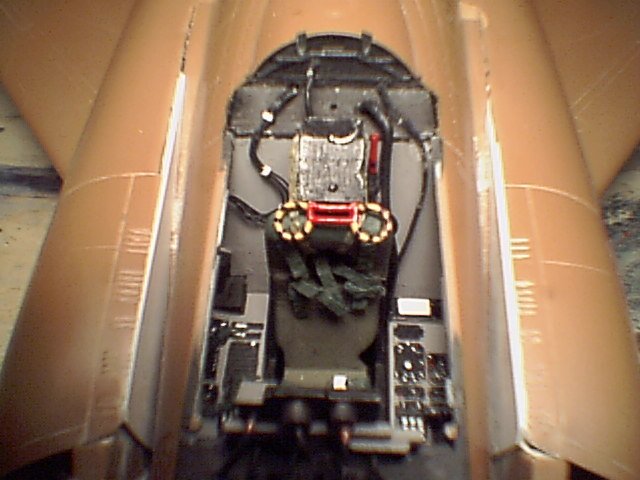
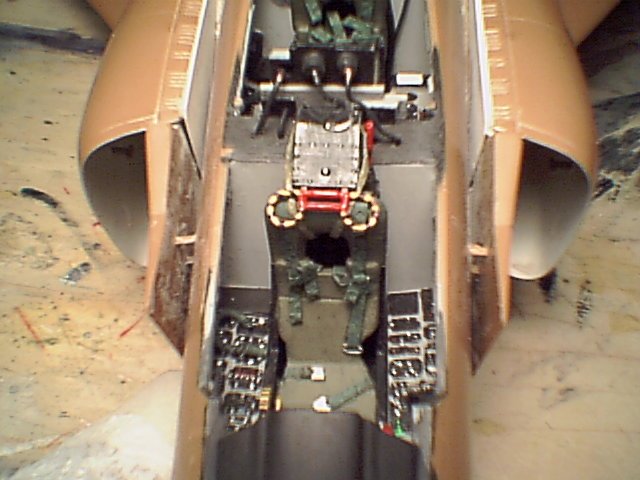
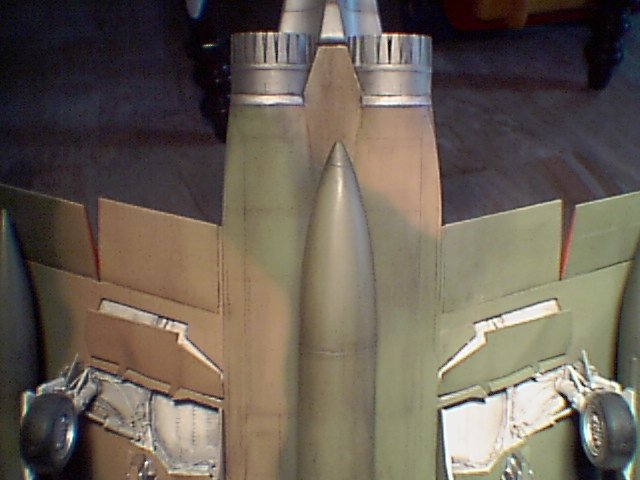
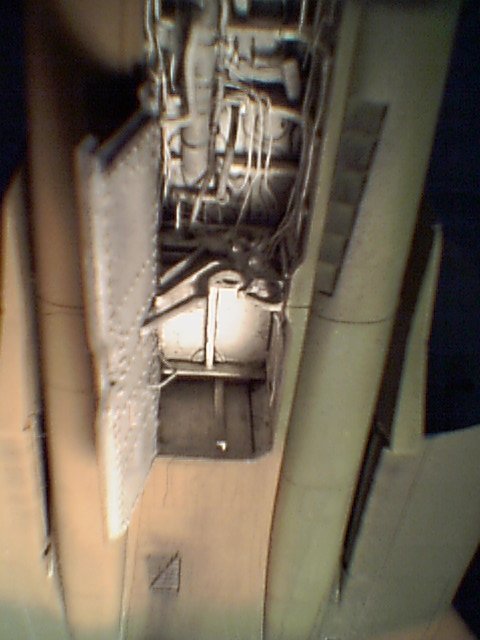
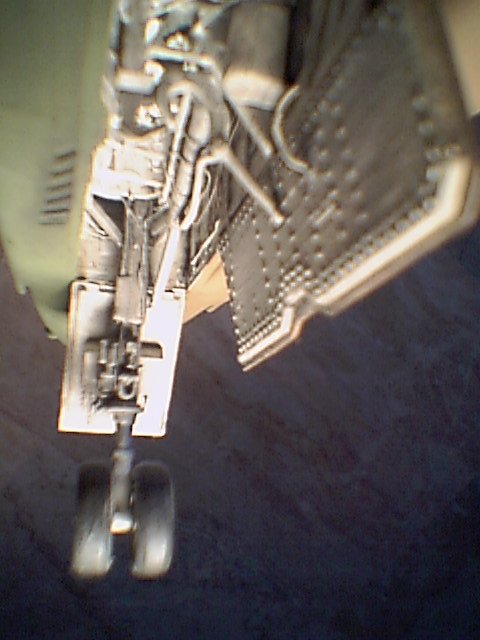
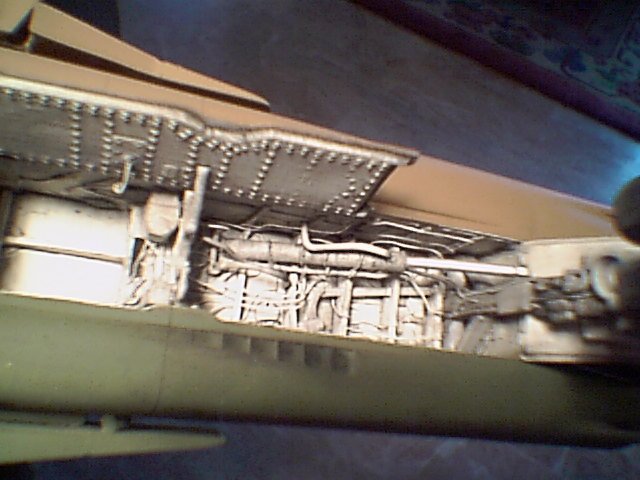
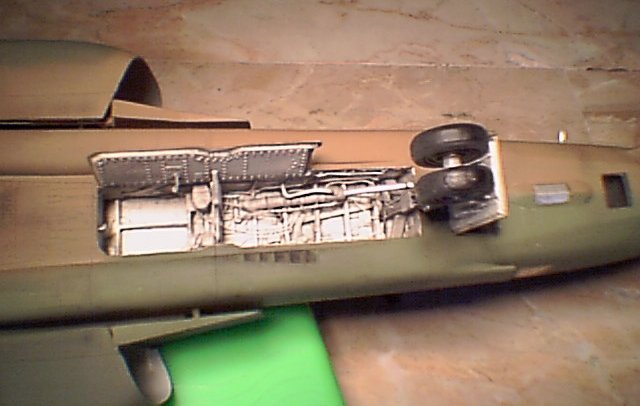
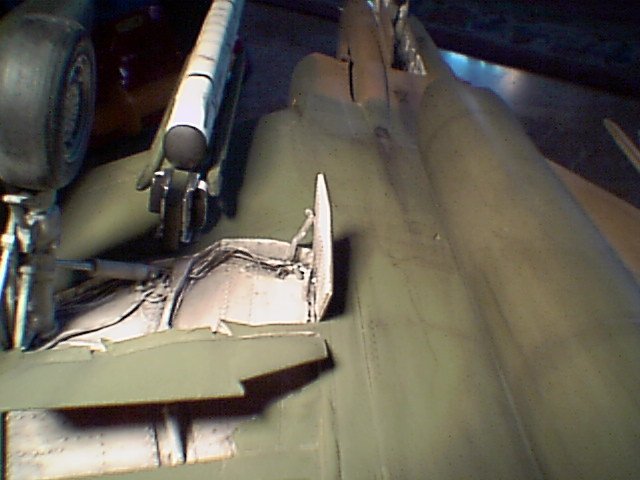
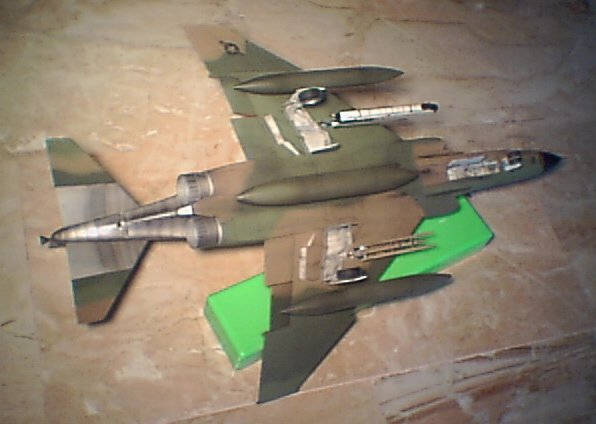
GEAR
Although
in my opinion the gears are among the finest features of the Revell kit, I
dedicated a considerable part of my efforts in detailing these. I did all this
work after the entire airframe had been assembled; now I’d suggest to do it on
subassemblies, that are smaller and can thus be handled better. Front bay has
been completed with reinforcing ribbings, levers, various boxes and hydraulic
lines; similar stuff on main gear bays. I used plastic sheets and bits shaped
with knife and files; lines are made out of copper wires of various diameters,
that come from electrical cables. I found good reference for these areas, so
that at the beginning I had the will of reproducing any single hydraulic line
(…!?). It took less than 15’ of work understanding that, in spite of the
good photos, 1 - it was to be all but easy to follow the path of each line; 2
– provided that I was able to spot each single line, it was beyond my skill to
place all of them without getting in the end a bay similar to a fine spaghetti
course; 3 – I had to proceed in a different way: I started adding a few lines
in various positions (where the effect seemed right), and went further until I
was satisfied with the result. I think now that this is important (as many
fellow modellers say): when it looks right, it IS right; and, more important: if
you like the model you are building, then you’re OK (simply because you met
your requirements, whichever they may be).
Kit
is complete with bulged and round tires; I chosen the latter, since bulged ones
looked a bit too much deflated in my opinion.
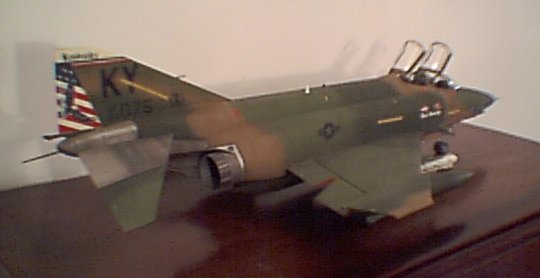
PAINTING,
WEATHERING AND DECALING
This
is my first airbrushed camouflage scheme. I knew from the start that it was
going to be a test bed, and in fact so it was. It was not easy for me to obtain
a not-too-soft edge among colors, especially because I wanted to spray freehand
without masking. Well, I must admit that the result is very far from being
perfect, but further experience will help. I started masking off the exhaust
area, gear bays, canopies and other clear parts. I sprayed Tan (Hu119), then
Dark green (Hu116) and finally Medium green (Hu117); the latter was “scaled”
with light green (Hu90, if I remember) to enhance the contrast between the
greens (see a Tools ‘n’ Tips article about this). Later, I touched-up a few
oversprays. Well, things were not so straightforward, neither I got a
particularly good result; being an airbrush beginner, I was anyway quite
satisfied with my paint job.
I
then painted exhaust area. I gave a first coat of Silver (Hu11) slightly tinted
with Orange and Black; the first adds a yellowish-titanium appearance, the
latter gives depth to the color (at least in my opinion). After it was dried, I
masked some panels and painted them with different shades of color. Then, I
sprayed a darker shade of silver along panel lines. Final weathering was done
with a chalk pastel powder wash, as per Tools ‘n’ Tips article. I was very
satisfied with the way it turned out. Everything was ready for MISTAKE#5! I did
not add a clear sealing overcoat to exhaust area, since I did not want to affect
the metallic look. Hence, I masked off this area before I gloss coated the whole
airframe prior to decaling. I sprayed a coat of Humbrol Clear Gloss and removed
masking from exhaust area, discovering that masking tape had left glue residues
and partially removed the chalk wash! I tried to fix that, but I was not able to
obtain a result as good as before. Next time, I will paint the metallic part
only after having fully completed the surrounding area, so I will not have to
mask it.
It
was my very first gloss coating before decaling; I noticed that gloss finish was
not even, but decided it could be enough. MISTAKE#6! I applied decals without
any setting solution, neither cutting the clear part (I had noticed that clear
backing support was tapered at the edges, and hoped this could have blended the
decal onto the surface. After decals were dried I looked at the model and saw so
much silvering I could not believe! Now, my problem was how to recover this
without having a new sheet of decal (too late I realized I could have searched
this first of all; in fact, I eventually got a new decal sheet, courtesy of my
German modeller friend Heinz Puzicha who obtained it from Revell). Quite
surprisingly, I did not submitted my problem to ARC forum, and experimented
several crazy ideas. First was cutting decal edge with a sharp blade and
removing silvered part with adhesive tape or gently scratching with the blade.
This is quite effective, but VERY, VERY difficult without damaging the decal and
painting. Second was removing some of the decal and painting them. I actually
did so with tail letters “KY” and with Stars and Bars insignia. I made masks
by myself, using adhesive labels printed with the computer. The only problem was
that label paper adsorbed paint while spraying and spread it underneath the
masks, leading to the need of later touch-ups and to a result not completely
satisfactory. For most of the decals, I decided to detach them (I used a mixture
of water, vinegar and dishwashing soap, that next time I will also use as
setting solution), cut the clear part and reapply with a solution of white glue.
It was all but straightforward, many decals broke up while detaching and each
became a jigsaw puzzle while reapplying.
Finished
this, I matt coated the plane and got MISTAKE#7: I did not mask off the clear
parts, that got frosted! I recovered this with several hand brushed coats of
Future (this is not available in Italy; I just had obtained a bottle from
America, courtesy of American husband of my wife’s cousin: grazie, Paul!).
Only
at this stage I knew it was possible to have new decals! I actually used a few,
mainly on the tail fin, where silvering was excessive. Since at this stage I had
Future, I airbrushed it prior to decaling and things worked out great.
A
complete sanding of the plane, with a new painting and decaling process would
certainly have led to better results than my tricky recovery did, but consider
this: I had been working on this plane for over one year (although with many
stops): I had to finish it quickly, to abort the project or to fly it through my
window; I chose the first option and discarded any major reworking.
CANOPIES
|
Click on images below to
see larger images |
 |
 |
I
added a few scratch built details to canopies, such as mirrors and hooks; all
these were made out of a sheet of plastic card (clear for the mirrors).
CONCLUSION & DISPLAY
|
Click on images below to
see larger images |
 |
 |
Photos were taken with a Sharp image capture
device that is not intended for fine works, but it is quicker to use (and more
forgiving on model flaws…) than my Rolleiflex; I hope that average quality is
enough, even if some images are out of focus.
Since I model big scale planes, I need big space
to display them. My usual solution is to hang the planes to my home’s walls
(photos will follow with one of my next projects…). Of course, this is not
very realistic when planes are reproduced in a “parked” configuration; this
is particularly evident on the Phantom, that has opened canopies and dropped
ailerons! Anyway, I find this an impressive display, and it saves a lot of shelf
space.
Although
this plane is very far from being perfect, I am pleased each time I look at it.
Any comments or suggestions will be welcome.
Thanks to everyone for attention.
Massimo
|
|