Background
Grumman’s
famous TBM/TBF Avenger is somewhat a paradox: it’s the largest single-engine
aircraft in the war that flew from the smallest of aircraft carriers; designed
for torpedo attacks, but dropped more bombs; still in service today, fighting
fires and preventing destruction instead of causing it.
Hello,
my name is Leon and I’m from Singapore. This is my first submission to ARC
although I’ve been a regular reader for over a year now. Like many, I’ve
strayed from the hobby for a good number of years, but am now making a comeback.
I hope all of you will enjoy my contribution.
The Kit
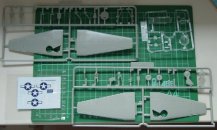
The
kit is a 1/72 Avenger TBM/TBF-1C from Academy. I picked the kit from a local
hobby shop because a good deal of word going around that Academy is producing
marvelous kits nowadays, and of course of its low price (about US $4 here in
Singapore).
There were a
few disappointments upon opening the box.The most obvious was the omission of an
instrument panel of any sort so some scratch building is in order. The engine
was molded with the cowling as a single piece and the detail is very basic. The
engine exhaust was solid ellipse-shaped object molded on the fuselage. The wings
each lacked the gun port for the single 0.5 MG. Wheel well details are
non-existence. The 0.5 and 0.3 cal defense armament should swap size. The clear
parts are ok but too thick, the turret framing is missing so masking will
require some imagination; the waist observation windows are the wrong bulge
types for the British Tarpoons (strangely, Hasegawa has one of those…).
The bug list
goes on… But hey, at least its got finely engraved panel lines plus it’s
only a $4 1/72. And since this is going to only be a practice kit to hone the
‘lost’ skills, all is forgiven.
It was only
later that I found that this kit is one of their earlier releases from the fine
prints on the box.
|
Click on
images below to see larger images
|
|

|
 |
|
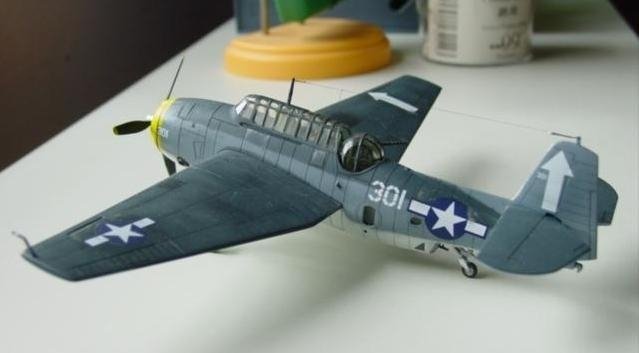
Construction
I’ll
try to remember what I’ve done because this project dragged on longer than I
liked.
Construction
began in the very basic cockpit. There were a few sinkholes/ejector marks to be
filled and sand here, no problem. The missing instrument panel was created by
drilling a measured, cut and shaped styrene sheet. Sit belts were made from
painted aluminum foil strips with buckles fashioned from tiny triangles from the
same aluminum foil. Since this would be a closed canopy Avenger, I decided not
to add any more details to the interior.
The
fuselage halves went well together. The only problem came when I tried to attach
the engine cowling piece. After much sanding and adjusting, I came to conclusion
the two were not meant to be match properly. So I just glued it and moved on,
and hope the painting would hide the flaw. The wrong bulged waist windows is
replaced with a flat clear styrene.
The
wings were given the gun ports by a 0.8 drill bit. Slightly oversized, but I
like it big. The mismatch 0.5 and 0.3 are also scratch built from stretch sprue.
The wingtip lights were clear sprue drilled with a 0.3 bit, touched with red and
sanded to blend in with the wingtips.
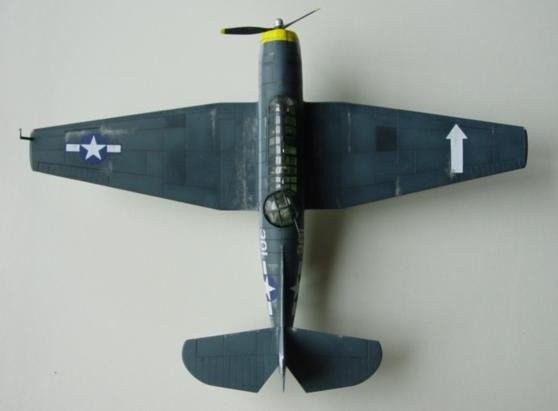
The
wings and horizontal stabilizers were glued to the fuselage. Again much
sanding/puttying was required due to fitting problems. To protect the rivets
detail at the wing roots, the details are masked prior to the sanding.
The
Avenger had a stowed arrester hook which only expose the hook end. This had been
omitted from the kit as well. I corrected this by fabricating one with sheet
styrene.
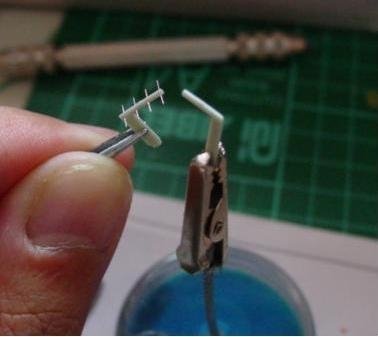
Forwarding
to after painting came the attaching of the fine parts. The antennas wires were
made from my wife’s hair and glued to the rigging simulated by thin twisted
copper wire strands extracted from normal electric cables. The Yaghi radar
antennas were enhanced by drilling, and adding small lengths of copper wire
strands. Wire strands were also used for brake lines.
|
Click on
images below to see larger images
|
|

|
 |

|
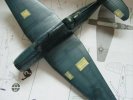
Painting,
Decals, and Weathering
I
brought the US Navy pack from Gunze. The pack contains 3 bottles of thinner
based bottles: gloss sea blue, intermediate Blue, Grey Blue. Since the Avenger
is to be taking the Tri color scheme, the gloss sea blue (for the top surface)
and intermediate blue (vertical surface) are used. The bottom color is matt
white with a drop or two of light grey. The cowl ring was matt yellow.
After
spraying the base colors some panels are randomly selected and masked the
unmasked surface are given light sprays of various tones of the base colors.
This gives a realistic patchwork look that was common to aircrafts operating in
the Pacific. The areas to be decaled were given shots of Tamiya Clear to
smoothen out the matt roughness.
The
kit decals were super thick and did not go down well, despite heavy coaxing with
Gunze’s Mr. Mark softener. Since I have already decided not to invest in any
aftermarket product on this kit. The kit decal would have to do. After the
decaling, the whole model was given a dull cote of Humbrol.
The
panel lines were given wash made from a mixture of watercolor black/brown and a
little washing detergent. This concoction is non-corrosive to underlying paint
and easy to remove in case of mistake. Oil stains were done using this brew too
and given the finger drag treatment in the direction of airflow. Paint chips
were simulated by dry brushing Gunze aqueous silver on the leading edges of the
wings, stabilizers and selected panels. It’s easy to overdo the paint chips
effect, so I took the advice from the more experienced modelers here in ARC:
stop when you feel that its almost done. Gun stains are black pastel brushed on.
A
final matt cote was shot and the tiny bits and antenna wires were added.
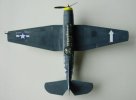
Conclusion
Not
the greatest of builds. The project took me about 3 weeks of daily grinding to
complete. At the end it was a sigh of relieve more than anything else.
Nonetheless I am glade the finish project looked like an Avenger.
With
the practice in this build, next the will be the definitive AM 1/48 Avenger just
arrived from Squadron.com 
Leon
Refenence:
-
Squardron’s
Avenger in Action
-
Wings
of Fame, Journal of classic combat aircraft, Vol. 13, pg 32-91.
|
Click on
images below to see larger images
|
|
|
|
 |
 |
|