|
While this kit
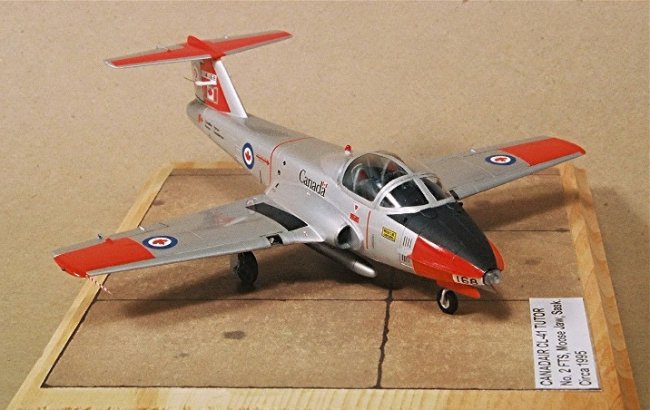
purports to be a Canadair CL-41 Tutor, it falls far short of the mark.
There are numerous issues in terms of outline and shape accuracy, and
there is very little in terms of detail provided in the kit.
There have been past efforts to portray the Tutor in plastic and resin,
which do a good job of capturing the shape and outline of the diminutive trainer
in 1/72 scale (Victoria Products vacuform and resin examples, Astra vacuform)
which are actually less trouble and work to build up compared to the Hobbycraft
injection molded kit.
However, I’d
picked up a couple of the Hobbycraft kits at a low blow-out price and decided to
tackle one, just to experience for myself the issues that have been mentioned in
past reviews of this kit. I was not
going to be disappointed….
The
first step was to plug off the inside of the engine intake tunnels with suitably
shaped sheet plastic and some putty. Then
try to reshape the fuselage somewhat, to be a closer representation of the
actual aircraft. The upper contours of the fuselage sides are molded such that
the fuselage section is a rounded square shape.
The actual aircraft upper fuselage section is more rounded off, and
almost a chord of a circle, by the time it tapers to the tail.
Much sanding and filing later, it was closer to the proper shape, and
likely as good as it was going to get given the thickness of the plastic and the
difficulty in dealing with the compound curves of the cockpit canopy fairing
trailing edge shape as it blends into the fuselage. The air brakes as
molded into the kit fuselage sides are too long, so the trailing edge and parts
of the upper and lower panel lines were filled and a new trailing edge panel
line scribed in. The tail end of the fuselage also requires re-shaping to
get the right taper at the jet pipe outlet.
|
Click on
images below to see larger images
|
|
|
|
|
A number of
panel lines and the prominent vents on the nose area were scribed onto the
fuselage halves, and a great deal of time was spent refining and sanding down
the trailing edges of all the flying surfaces.
The kit provided landing gear was quite poor in terms of detail and
crispness, and fortunately I had some spare resin cakes of parts from some of
the VP Vacuform kits which I robbed for some better wheels and gear, along with
the longer belly mounted fuel tanks. While
I was at it – going through my stash of spare Tutor bits I’d cached away –
I also pulled out a spare Astra Vacuform canopy to use as well.
The cockpit was
built using the kit floor, seats, instrument panel, consoles and rear bulkhead,
upon which some detail was added by way of paint, scribed lead foil diamond
quilt, and a coaming over the instrument panel.
I also added the canopy hydraulic piston between the upper rear areas of
the seats. While I could have added
more detail, since the canopy was going to expose a lot of the interior, I left
it at the “adequate detail” stage in order to get on with the project.
A couple of lead weights (fishing split shot weights) were glued into the
nose to make sure the model perched on the tricycle undercarriage properly.
Once the
interior was as complete as it was going to be, I glued the fuselage halves
together, and shortly thereafter, the one piece wing joined the assembly.
I left the horizontal stabilizer off the model for painting separately,
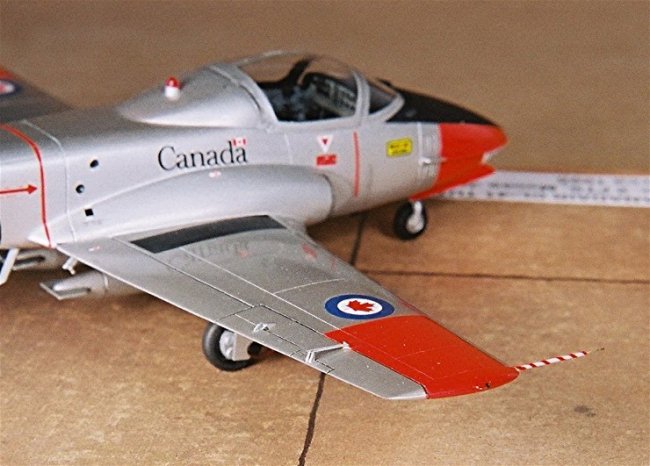
to ease masking woes around the tail. The
inner leading edges of the wings needed reshaping to try to capture the
pronounced droop in the root area leading edges there.
I left out the clear landing light parts on the wings, electing to later
glue on thin pieces of the clear plastic shrink wrap from a sealed model.
The nose contours also needed some filing and sanding to better capture
the profile and shape of the Tutor.
I found that
the vacuformed canopy was not going to fit the kit cockpit area very well, so
after much test fitting and routing-out mating edge recesses on the fuselage
side edges with my Dremel tool and a small dental burr, I got the canopy glued
on and more or less flush fitted where it counts.
The trailing edge of the canopy at the upper fuselage was also a poor
match and the kit’s fuselage profile had to be built up and blended in to
match the rounder profile of the canopy. This
required some careful filling, sanding and patching to get a smooth contour,
upon which I re-scribed the panel and hinge lines.
I drilled
sockets into the landing gear struts and mounting points to accept a stub of
stiff wire to insure that the gear legs would be secured properly as the kit
mounting sockets left a little to be desired in terms of fit versus the VP resin
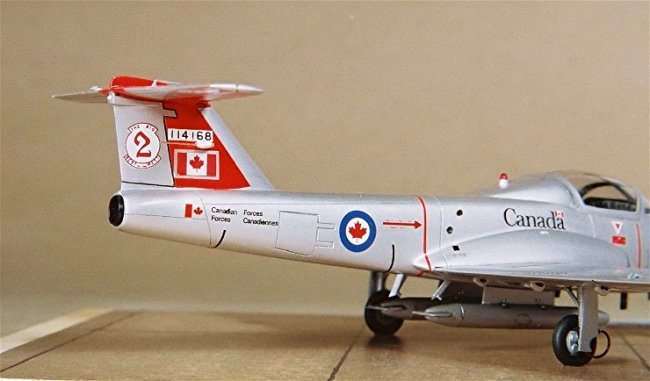
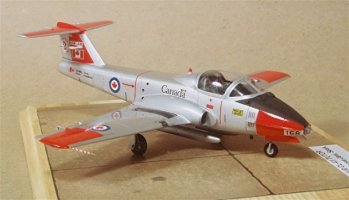
gear legs. As the aircraft was
going to be finished in the overall painted gloss aluminum scheme used during
the 1990’s, I left the gear legs off the model until after the final gloss
coats were done so as to capture the different tonal quality of the gear legs.
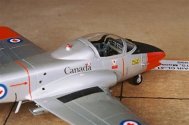
Just prior to painting, the nose strakes were glued on to the model using
suitably shaped 0.010” (0.25mm) sheet plastic, and the windshield de-icer
fairings and small scoops just forward of the windscreen were glued on as well.
|
Click on
images below to see larger images
|
|

|
|
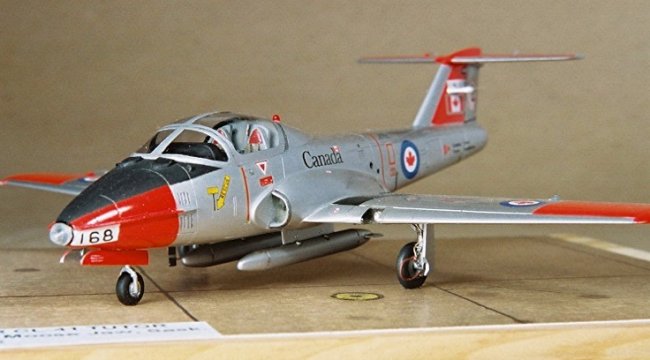
I airbrushed on
Floquil’s Old Silver as the base aluminum coat, over which I masked the red
panel areas and sprayed on a white base coat.
Testor’s Model Master Guards Red was then sprayed on to the high
visibility red panels on the tail, nose and wing areas.
Future was then sprayed onto the model to simulate the gloss aluminum
paint finish, and to provide a base for the decals.
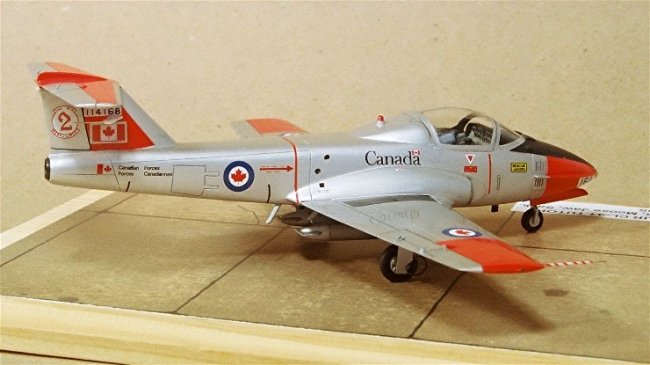
Decals came from a variety of sources, mainly a spare Victoria Products
vacuform kit set of decals and a sheet of Arrow Graphics Tutor markings.
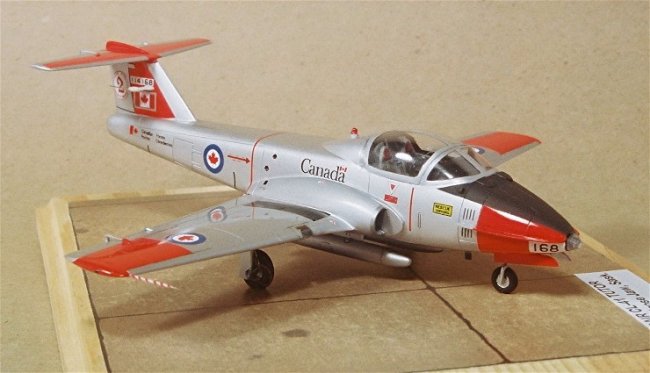
The landing
gear was assembled and glued on, with added brake line detail to the main gear.
Other small details were also added in the way of the belly tank
deflectors, fuel vent mast, tail antennae, anti-collision lights and trim tab
actuator rods. The jet pipe was
made from a section of brass tubing painted a gun metal colour and weathered a
bit with some graphite. The final
coat of paint was the flat black anti-glare panel on the nose.
The nose light was outlined with a small strip of black decal to match my
photo references.
Well, it looked
pretty close to a Tutor, and the work involved to get it to this point WAS quite
an effort, and it still wasn’t as fully detailed or as accurate as I felt it
should be. I am convinced that my stash of Astra and VP vacuform kits
are still worth keeping around for the next time I feel like doing a Tutor
model. I don’t think any
manufacturer is going to release a new, improved injection molded kit of the
classic Canadian jet trainer in my lifetime, so I will stick with the vacuform
kits for the time being.
Geoff
|
Click on
images below to see larger images
|
|

|

|
|
|