|
The
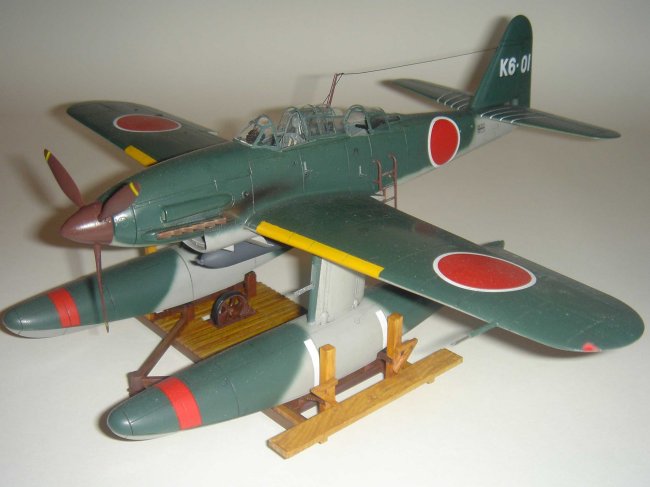
Aichi M6A1 Seiran was developed to be a submarine-launched attack floatplane for
the Imperial Japanese Navy. It was intended to be used with the I-400 class
submarine where three Seirans could be stored inside a specially designed hangar
with wings, horizontal and vertical control surfaces folded. The I-400 would
surface, extract the aircraft from the hangar, attach the floats, and launch the
Seiran by catapult. It was said that the floats could be jettisoned and the
aircraft abandoned after the mission.
28
Seirans were constructed by 1945 and hastily loaded on to the aircraft carrier
submarines. The original strategy for the Seiran was to bomb the locks of the
Panama Canal to impede Allied ship movements. Instead, the target was shifted to
The American anchorage at Ulithi in order to attack aircraft carriers stationed
there.
Two
submarines, the I-400 and the I-401 sortied on July 23, 1945 with a full load of
3 Seirans each. Before reaching Ulithi, however, I-401 received a message
informing them of Japan's unconditional surrender with orders to return to
Japan. This put an early end to the Seiran's first and only combat mission.
Before returning to port, the crew jettisoned the Seirans into the sea in order
for them not to fall into the hands of the enemy. Fortunately for posterity, one
Seiran did survive and was found by the American forces. It was restored and is
now on display at the Udvar-Hazy Center of the Smithsonian's National Air and
Space Museum in Washington, DC.
Click on
images below to see larger images
I
started this build at the request of a local hobby shop owner. When Tamiya
released their I-400 class submarine in 1/350, the hobby shop owner decided to
build it himself, and since he had a spare Seiran sitting at the shop he thought
it would be nice to have the submarine next to the 1/48 version of the plane
stored within the hangar of the sub. Naturally I agreed. It was determined that
the kit would be built out of the box and with minimal weathering at the owner's
request.
As
I looked over the kit, I made the mistake of browsing through the available
aftermarket parts and found two that I'm actually very pleased I purchased.
First is the excellent exhaust by Moskit. It is made of metal, and arrived
looking as it does in the pictures (I didn't have to paint it at all). Most
amazingly of all, it is completely hollow. The pictures show the comparison
between the kit part and the Moskit exhaust. I can't say enough about this
product! If you see that there is a Moskit exhaust for an aircraft or tank
you're building, I highly recommend you pick it up (I have one for a Panzer I in
my stash). The second bit of aftermarket detail I added was the Eduard
Photo-etched set. It added a lot of detail (that is sadly, not really visible)
such as the radiator exhaust ducting panels, pop-out fuselage and float steps,
instrument panel and bomb fins to name a few. The bomb fins added a lot of
realism and took about a day to get just right.
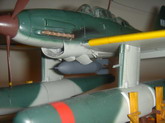
I
decided to cut out the wingtip navigation lights and replace them with clear
plastic. I was told what works well for this is the clear handle of a cheap
toothbrush! I think I used I tired old tooth brush from the toiletry kit
provided at a hotel I stayed at or an airline I flew (can't remember which). I
just cut a big chunk of toothbrush and glued it to the wing light, and carefully
sanded away the excess. I think I changed the contour of one of the wings, but
I'm told it's hardly noticeable. Syringe needles were used to replicate the
pitot tube on the port wing.
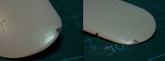
I
wanted to pose the canopy open to show off the Eduard photo-etched detail and
proceeded to cut apart the single piece Tamiya part. Having done this, I dry
fitted them to the canopy and to my horror, the canopy did not sit well when
they were placed one on top of the other; the plastic being too thick. I thought
I could get away with it by sanding down the inside of the sliding parts of the
canopy and sanding down the lower ledge of the fixed portion to give it a more
realistic look. Big mistake. As I was sanding the inside of the canopy down, it
snapped in two. After a few days of utter depression (how am I going to explain
to the hobby shop owner I just ruined his model?), I decided to check online.
Wouldn't you know it? Squadron makes a vac-formed canopy for the Tamiya kit!
While
this was on order, I stuffed the interior with tissue and used blue tack to seal
the edges of the cockpit (the great thing about float planes is that there is no
gear bay to mask off!) I actually used rattle cans for this build since I wasn't
sure what the appropriate color was with Gunze lacquer. In order to do the
feathered edge, I decanted some of the rattle can paint into my hi-grade
airbrush and went over the hard edged camouflage line. It took several tries as
I am a bit ham handed with my airbrush but I finally got it looking acceptable.
I
applied several coats of Tamiya rattle can gloss clear to have a smooth surface
to apply the decals. Another headache. The decals for the Hinomarus wouldn't
conform to the surface using either Mr. Marksofter or Solvaset! After a few
days, it started to bubble up and deform. Luckily the owner of the hobby shop
had a spare decal sheet, so I used a sharp #10 blade and some Tamiya masking
tape (in order not to pull off the paint underneath) to remove the old decals.
Disaster! The new Hinomaru decals were badly cracked and didn't look up to
scratch. So, I used my caliper to take some diameter measurements, tore them off
again and in a fit of rage, went out to buy the old Tamiya 1/48 A6M5c Zeke
because the decals were just the size I needed. These went on without a hitch
and finally snuggled into the panel lines. I also decided to mask off and paint
the yellow leading edge identification bands rather than use the decals. I
sealed it with yet another coat of gloss clear, gave it a simple wash and some
exhaust staining and a good dose of Testor's Dullcote.
The
canopy finally arrived and went on without a hitch. Everything was coming
together. I asked a friend to help me paint the dolly for this float plane and
he did an outstanding job simulating the wood. The dolly is all plastic and
stock. No aftermarket parts were used on that, just some Gunze "Radome"
for the lighter parts and "wood brown" for the darker ones. I glued
all the fiddly-bits on and added the aerial. Voila – after eleven months of
work, a lot of sweat, tears and decals – a Japanese attack floatplane that
almost saw action.
This
was recently entered at the IPMS Philippines Bert Anido 6th National Scale Model
Competition (which was also our celebration of our 40th anniversary as a club)
and won 2nd Place for 1/48 Aircraft, Modified. It now resides at the hobby shop
at Trinoma Mall.
This
is just my second aircraft submitted to ARC, and I hope to share a few more with
you through the years. Cheers again to Steve Bamford for keeping such a great
site up and running!
A
proud member of IPMS Philippines Bert Anido
Vino
'Shrikes' Nanagas
Click on
images below to see larger images
|